
Wondering how to use the Duolingo app? It’s the most popular app in the world for language learning and there’s never been a better time to start learning a new language! This Duolingo Tutorial will walk you through the exact steps on how to set up your Duolingo app so that you can get to learning as soon as possible.
This post is meant for beginners who don’t have accounts with Duolingo and are wondering “How does Duolingo work?!” However, if that’s not you, then check out these tips most users DON’T know or this study plan for how to use Duolingo to learn quickly.
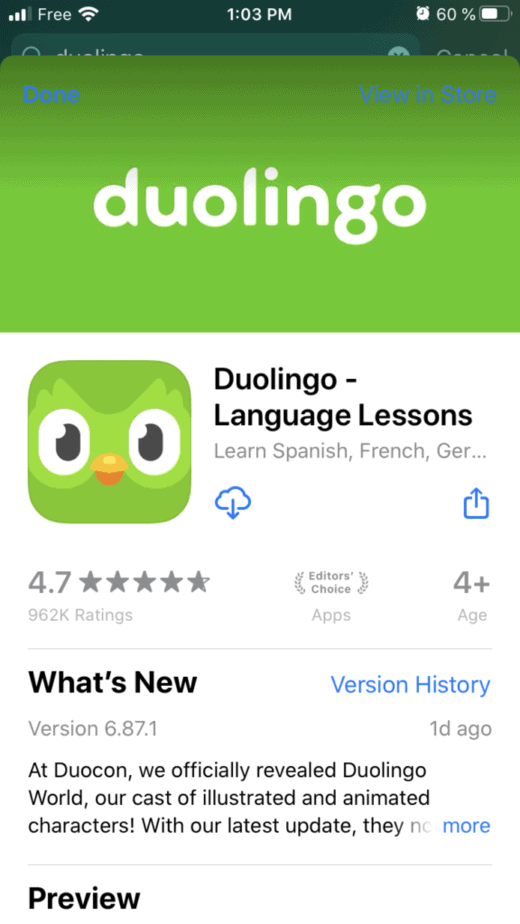
1: Download Duolingo from the App Store
The first step is to head to the App Store and download Duolingo if you haven’t already! It is available for free for iOS (iPhones) and Androids.

I seriously would not be able to learn languages without italki (I’m taking 3 classes per week right now) try out a class and you’ll thank me later. They’re usually $9 or less!
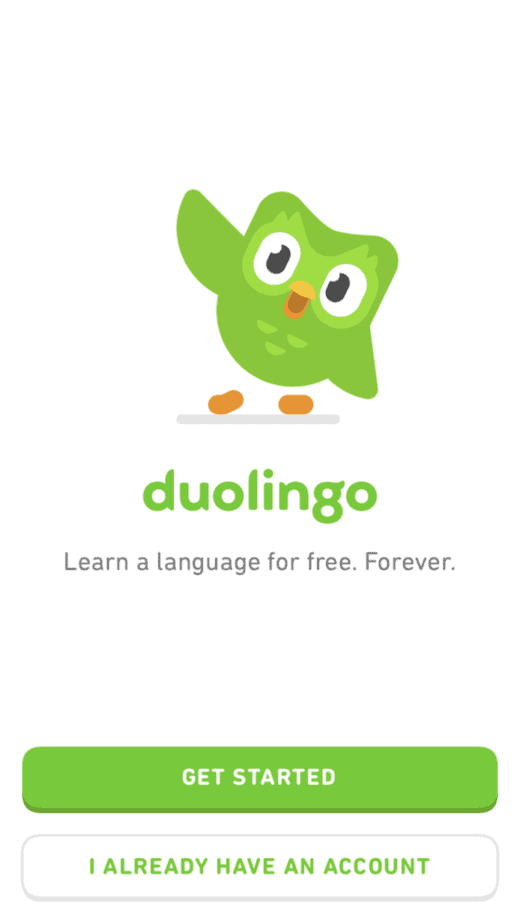
2. “Get Started” on Duolingo
After you download Duolingo, you can open the app and you will have the option to “Get Started.” If you’ve never created an account before on Duolingo, that’s the option you would choose.

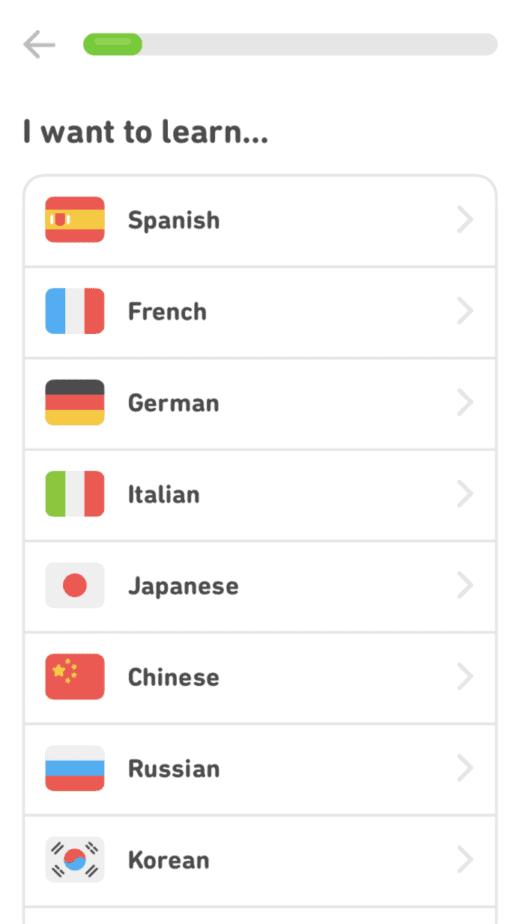
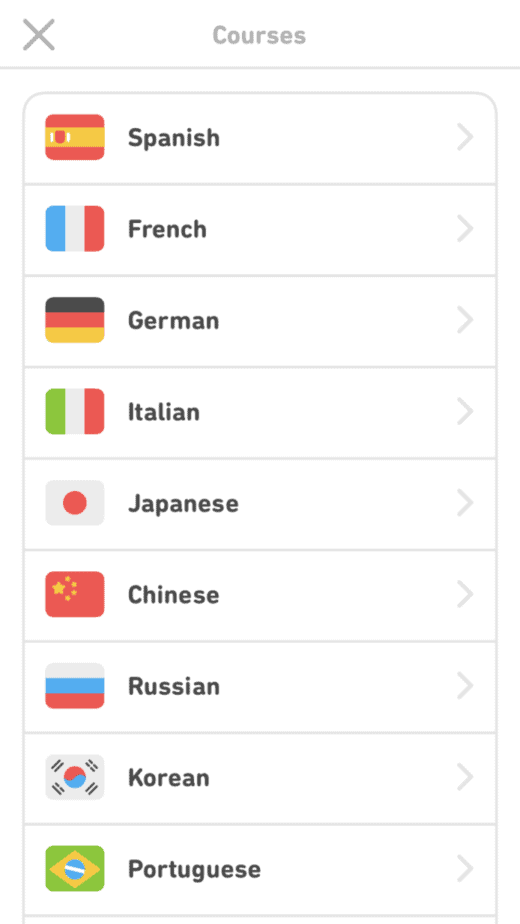
3. Choose the Language You Want to Learn
After you click “Get Started”, you will choose which language you want to learn on Duolingo. Right now, you will only choose one, but I will show you how to add more later on.
Want to learn a language quickly and never forget it? Check out this book on Amazon about how to stay fluent in a language over time without losing fluency!

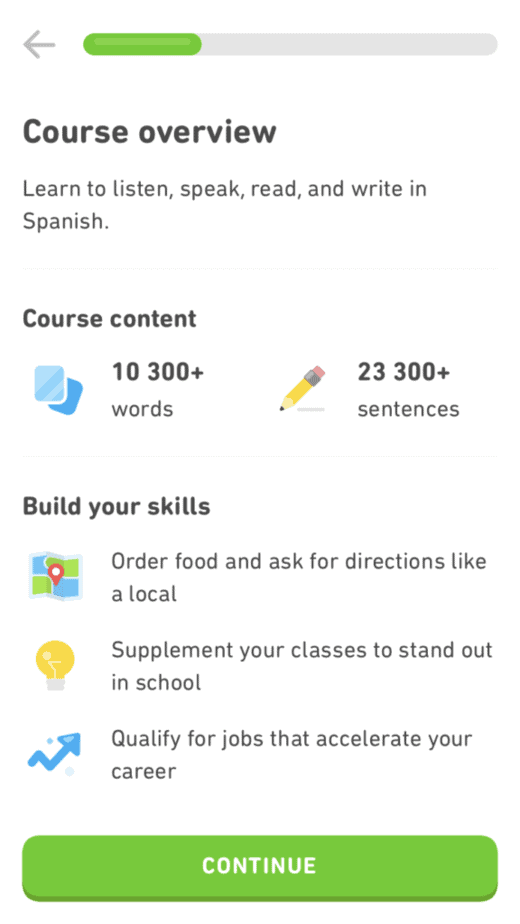
4. Course Overview
The next slide shows you a little course overview of the language course that you chose. You don’t have to do anything here, you can just continue to the next step.

If you want to learn a language faster than ever, I also highly recommend reading Benny Lewis’s book on how to learn a language in JUST 3 months.
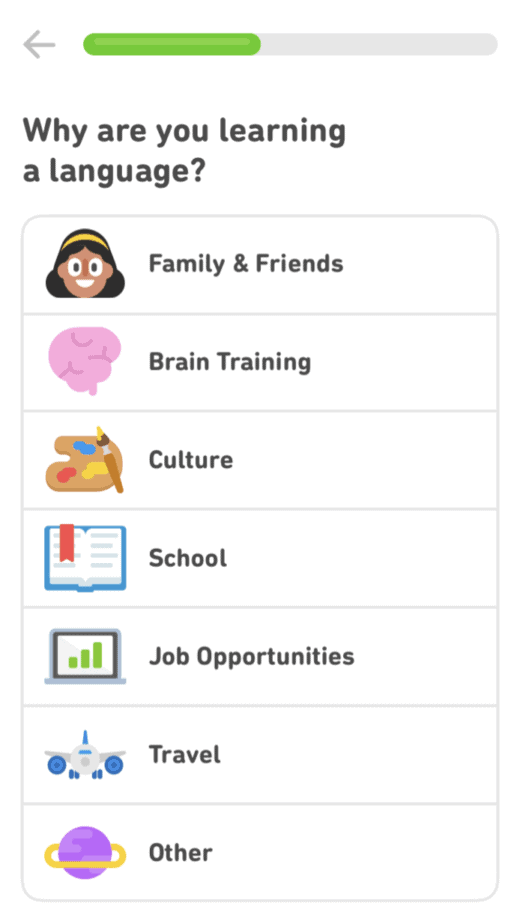
5. Choose Why You Are Learning a Language
Here you will choose why you are choosing to learn a language on Duolingo. It doesn’t matter which option you choose, this is just Duolingo trying to collect data on why users are using Duolingo. It won’t make any difference on the type of lessons/courses on the app.

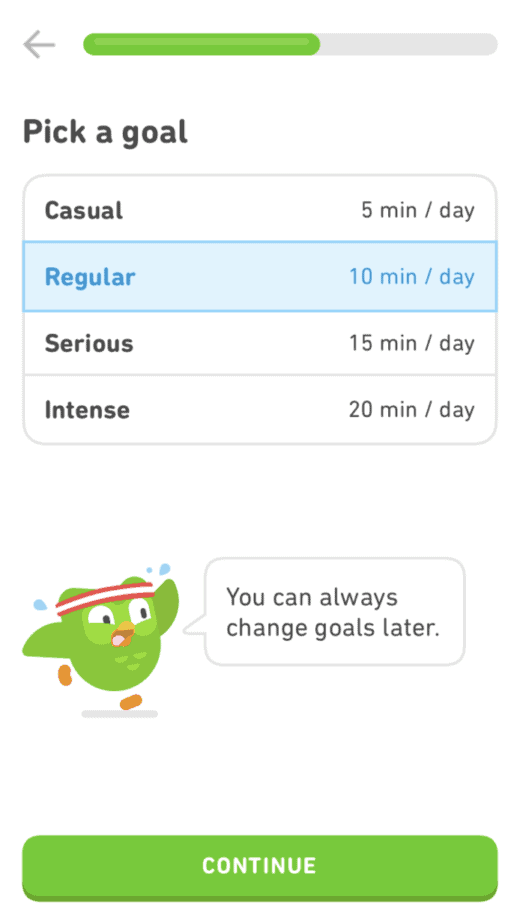
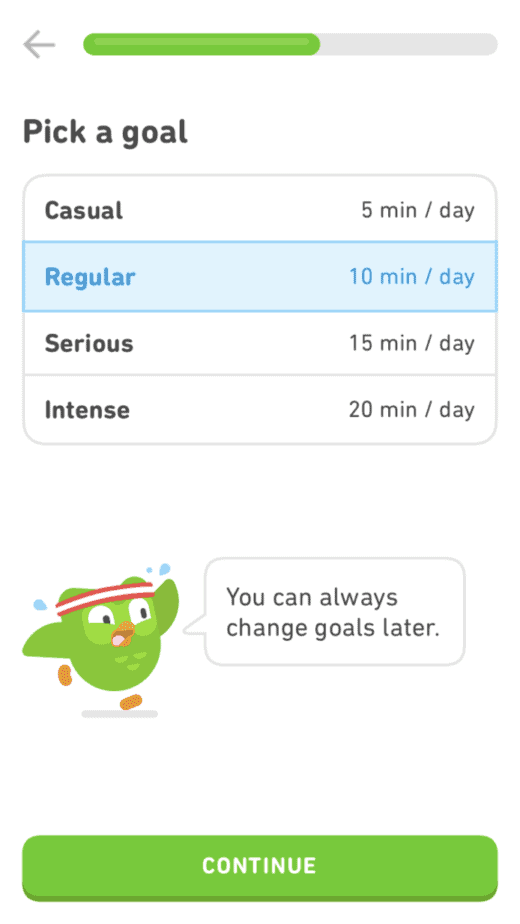
6. Pick Your Daily Goal (You Can Change This Later)
Now you will choose your daily goal on Duolingo. For me, I always choose the highest option, but you can change your Duolingo daily goal at any time.
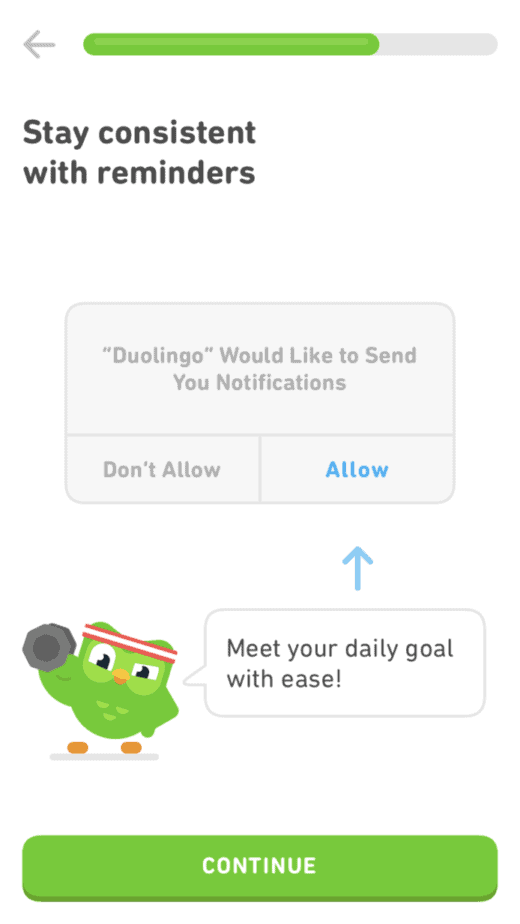
7. Accept Notifications from Duolingo
If you want to be reminded to use Duolingo everyday, you are going to way to choose to accept notifications from Duolingo in your settings. Just click “Allow” and Duolingo will let you know every day that you need to complete your lessons!

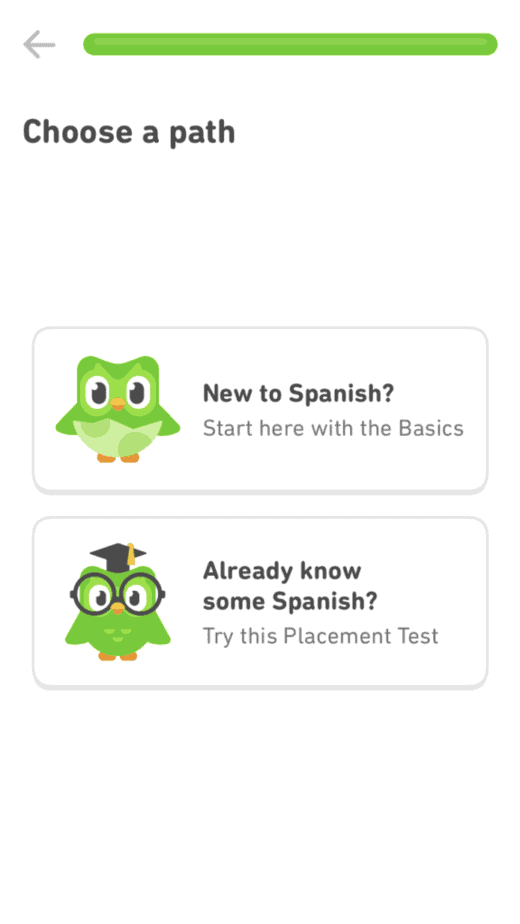
8. Choose Your Language Level
Next, you will choose whether you want to start as a complete beginner or whether you think you know a bit more. If you choose the Placement Test, it will give you questions that will test how much you know.
Depending on how well you do, you may be able to skip certain lessons and start at a more advanced level.
Since I already spoke Spanish fluenty before using Duolingo, I tested out of almost all of the Duolingo tree. I usually don’t choose the Placement Test option unless I feel very confident that I know the language well enough.
I think that Duolingo is great at hammering in the basics and forcing you to repeat them until they become second nature. For this reason, I don’t recommend choosing the Placement Test.

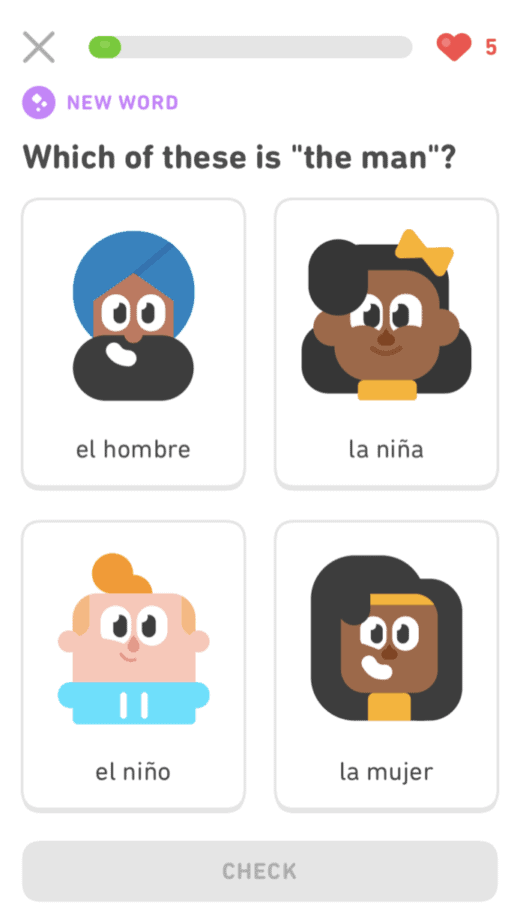
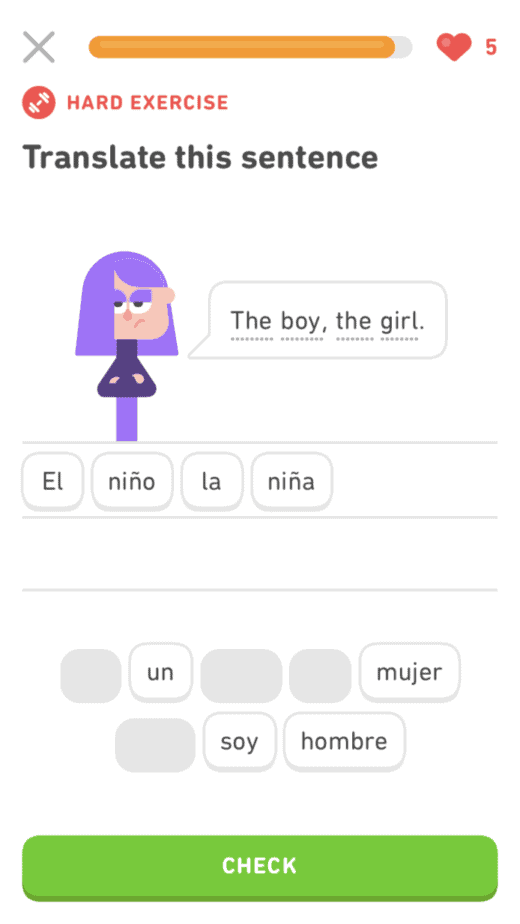
9. Take Your First Duolingo Lesson or Placement Test
After you choose, you will immediately start your first Duolingo lesson or your Placement Test. The first lesson is the most basic and is actually the first lesson in your Duolingo tree.
You will mostly just be matching vocabulary and translating short, simple sentences.


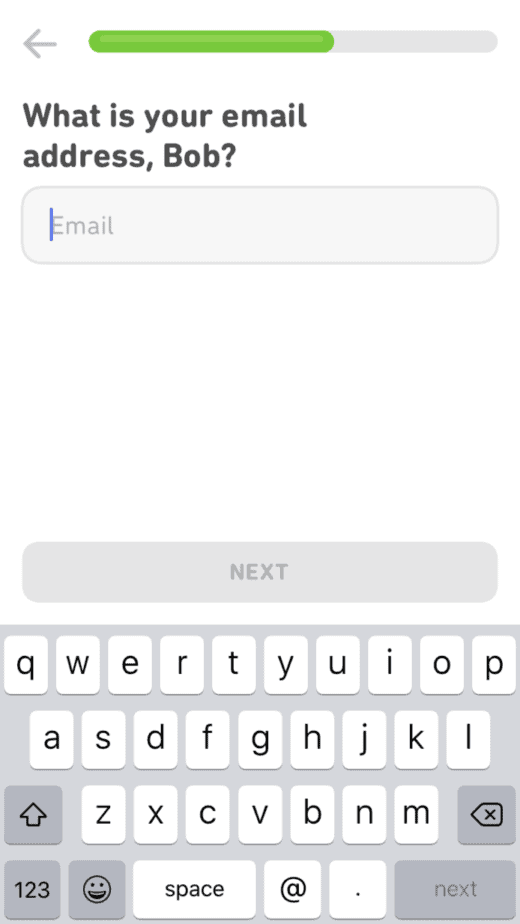
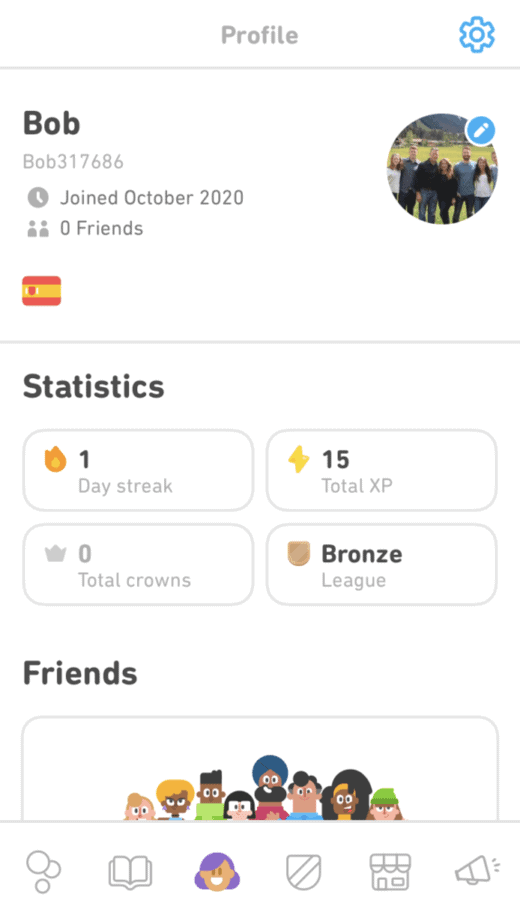
10. Create Your Duolingo Profile
Now, you finally get to the part where you create your Duolingo profile! Don’t worry, it will save all the progress you’ve made so far and the lesson that you have completed will be included in your profile.

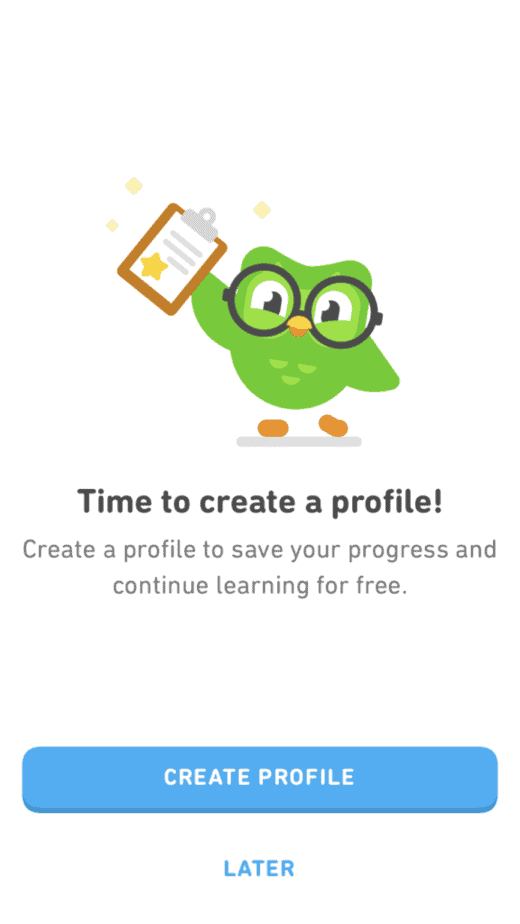
You will need to give Duolingo your name and email address, and you will create a password for your account. All of this will be saved on your profile and you can go to your profile once it’s created.
To avoid being locked out of your account in the future, make sure you make note of which email you used to log in and what password you chose.
Then once you have your account, go into your profile (the tab with the head symbol) and take a picture of the username that Duolingo created for you. All of this information will make it so you can log back into your account easily.

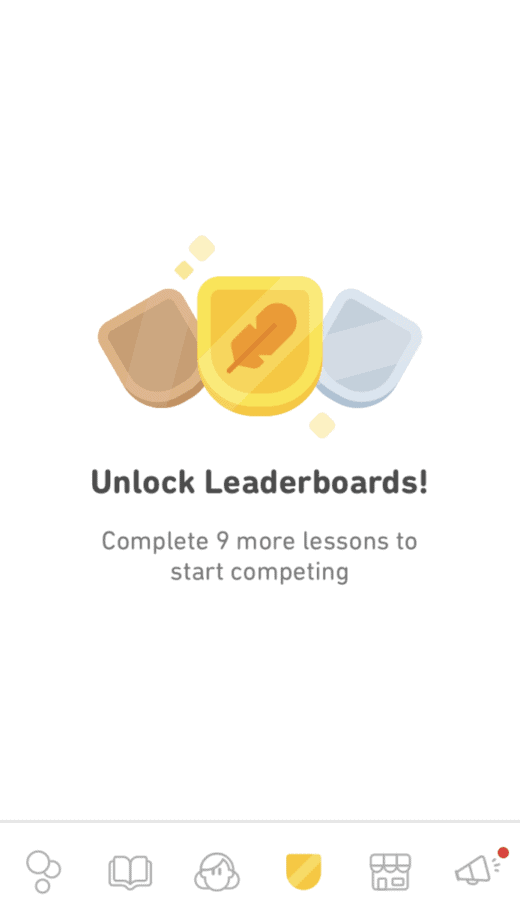
11. Complete 9 Lessons to Unlock Leagues
Now that you’ve created your account, you will need to complete 9 lessons in order to compete in Duolingo Leagues! Duolingo Leagues are basically a competition against other users who are at the same level as you.
You can learn more about Duolingo Leagues here as well as understanding what points are in Duolingo and how to find out how many you have here.

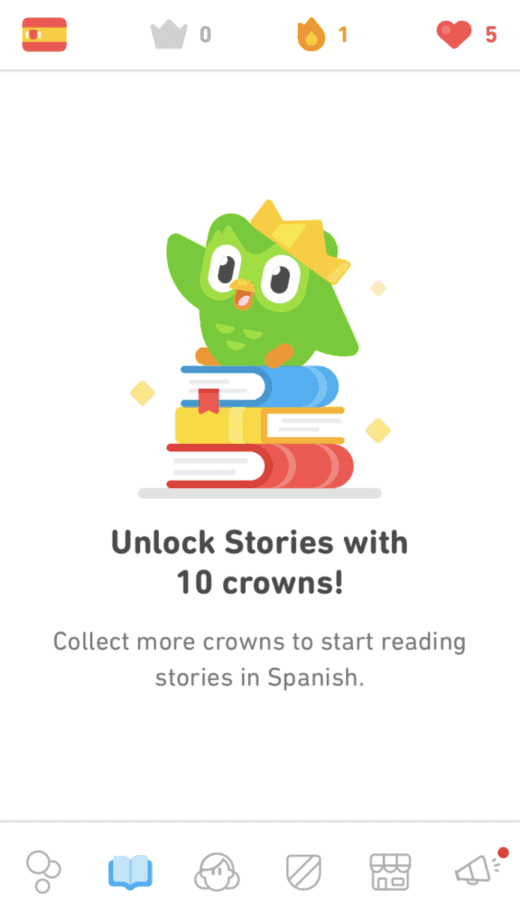
12. Earn 10 Crowns to Unlock Stories
The next step is to earn 10 crowns so that you can start using Duolingo Stories. Duolingo Stories are short stories that get progressively harder and test your listening comprehension and help you learn vocabulary.
You will need to first understand what Duolingo Crowns are, then you can focus on earning those 10 crowns as soon as possible! Once you’ve earned 10 crowns, you can now learn using Duolingo Stories!

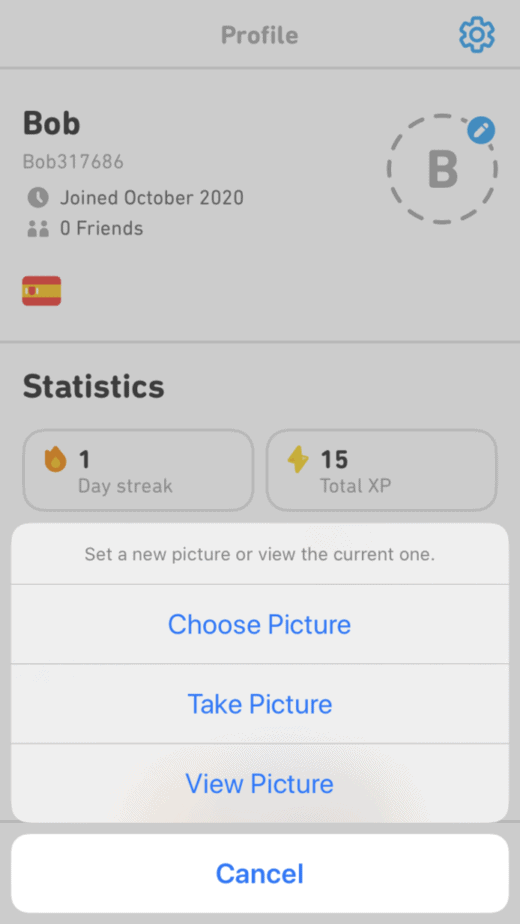
13. Upload a Profile Picture to Your Duolingo Profile
The next step is to upload a profile picture to your Duolingo profile. You can do this by clicking on the icon of the woman’s head to get to your profile.
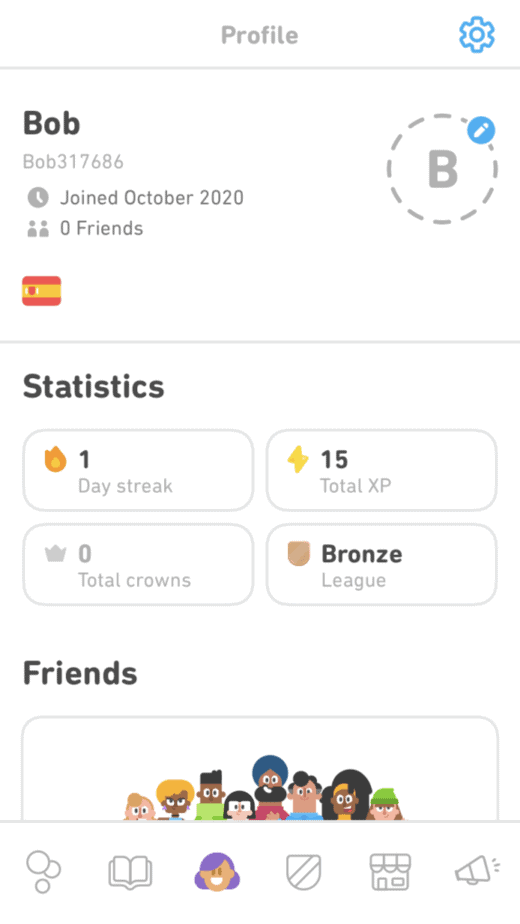

From there, click on the pencil icon and it will give you the option to choose a picture or take a picture for your profile picture. It’s that easy! (:
P.S. You’ll also earn your first Achievement by doing this!

14. Add Duolingo Courses or Change the Language You Are Learning
If you would like to add another Duolingo course or change your Duolingo course, you can do that by click on the flag icon in the top right corner of the app. From there you can click the plus icon and you can see all of the courses available.
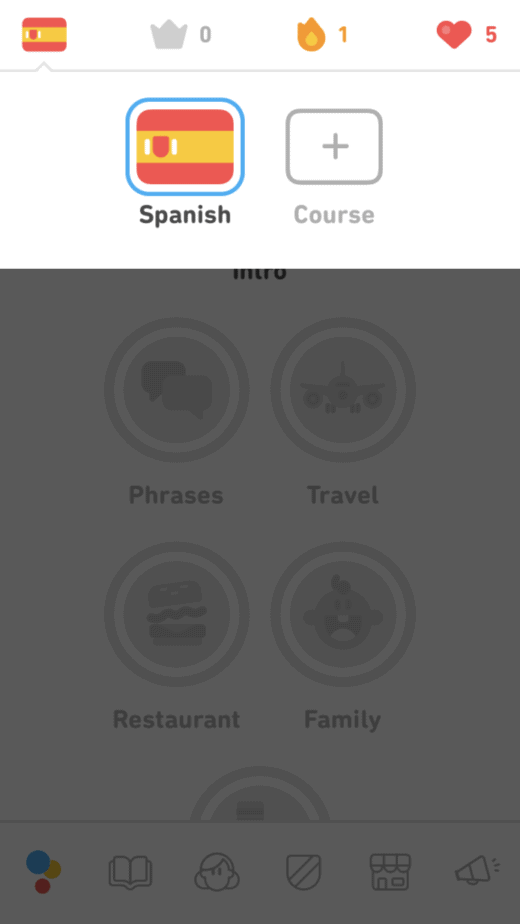

You can add as many courses as you want and try out all the languages available if you choose to!

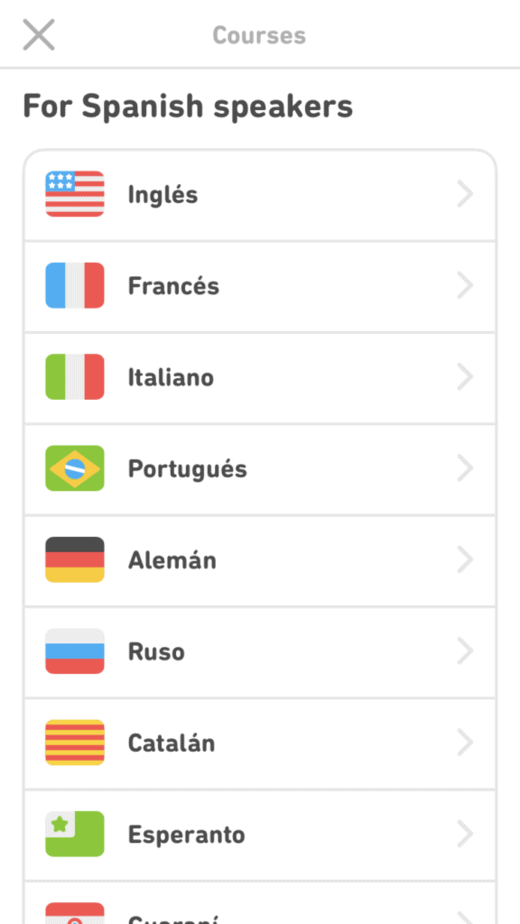
If you scroll down to the bottom of the list of courses available, you will see the option to see even more courses. Click on that and you can choose to take a course from other languages besides English.

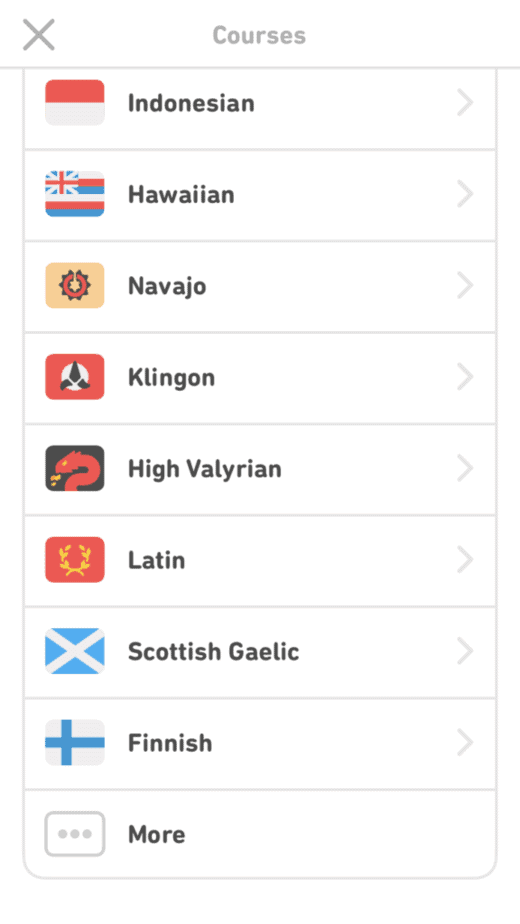
For example, instead of taking Spanish for English speakers, you can take the English for Spanish speakers course. This is known as a “reverse tree.”

Now you are ready to use Duolingo!
Language Learning Must-Haves
- iTalki Language Classes: The #1 reason why I’ve been able to learn languages from home. Take conversation classes from a native speaker for only $5-$10 an hour.
- How to Be Fluent Books: Two of my favorite books about language learning have definitely got me super excited about learning a language and I highly recommend reading both!
- Fluent Forever: How to Learn Any Language Fast and Never Forget It
- Fluent in 3 Months: How Anyone at Any Age Can Learn to Speak Any Language from Anywhere in the World
- A Language Planner: Keep track of your scheduled language classes, set language goals, and organize your study schedule with my favorite planner ever.
- Harry Potter in Your Target Language: Reading a beginner book that you’re familiar with is an incredible way to learn vocabulary quickly!
- The Perfect Language Notebook
Learn More About How to Use Duolingo
- What are Duolingo Gems & Lingots?
- How to Earn Points Quickly on Duolingo
- How to Earn a Golden Owl Trophy on Duolingo
- Everything to Know About Duolingo Levels


Dayna Brockbank is a travel and language-learning blogger who has lived around the world but has now settled in Nice, France. She speaks 3 languages at varying levels of fluency: Spanish, Italian, and French, and graduated with a Bachelor’s in Spanish Education. She and her husband focus on making travel part of life by living cheaply and traveling on a budget.